19 min to read
Proxmox VE Complete Guide - Enterprise Virtualization Platform
Comprehensive guide to Proxmox VE installation, clustering, and Ceph integration
Overview
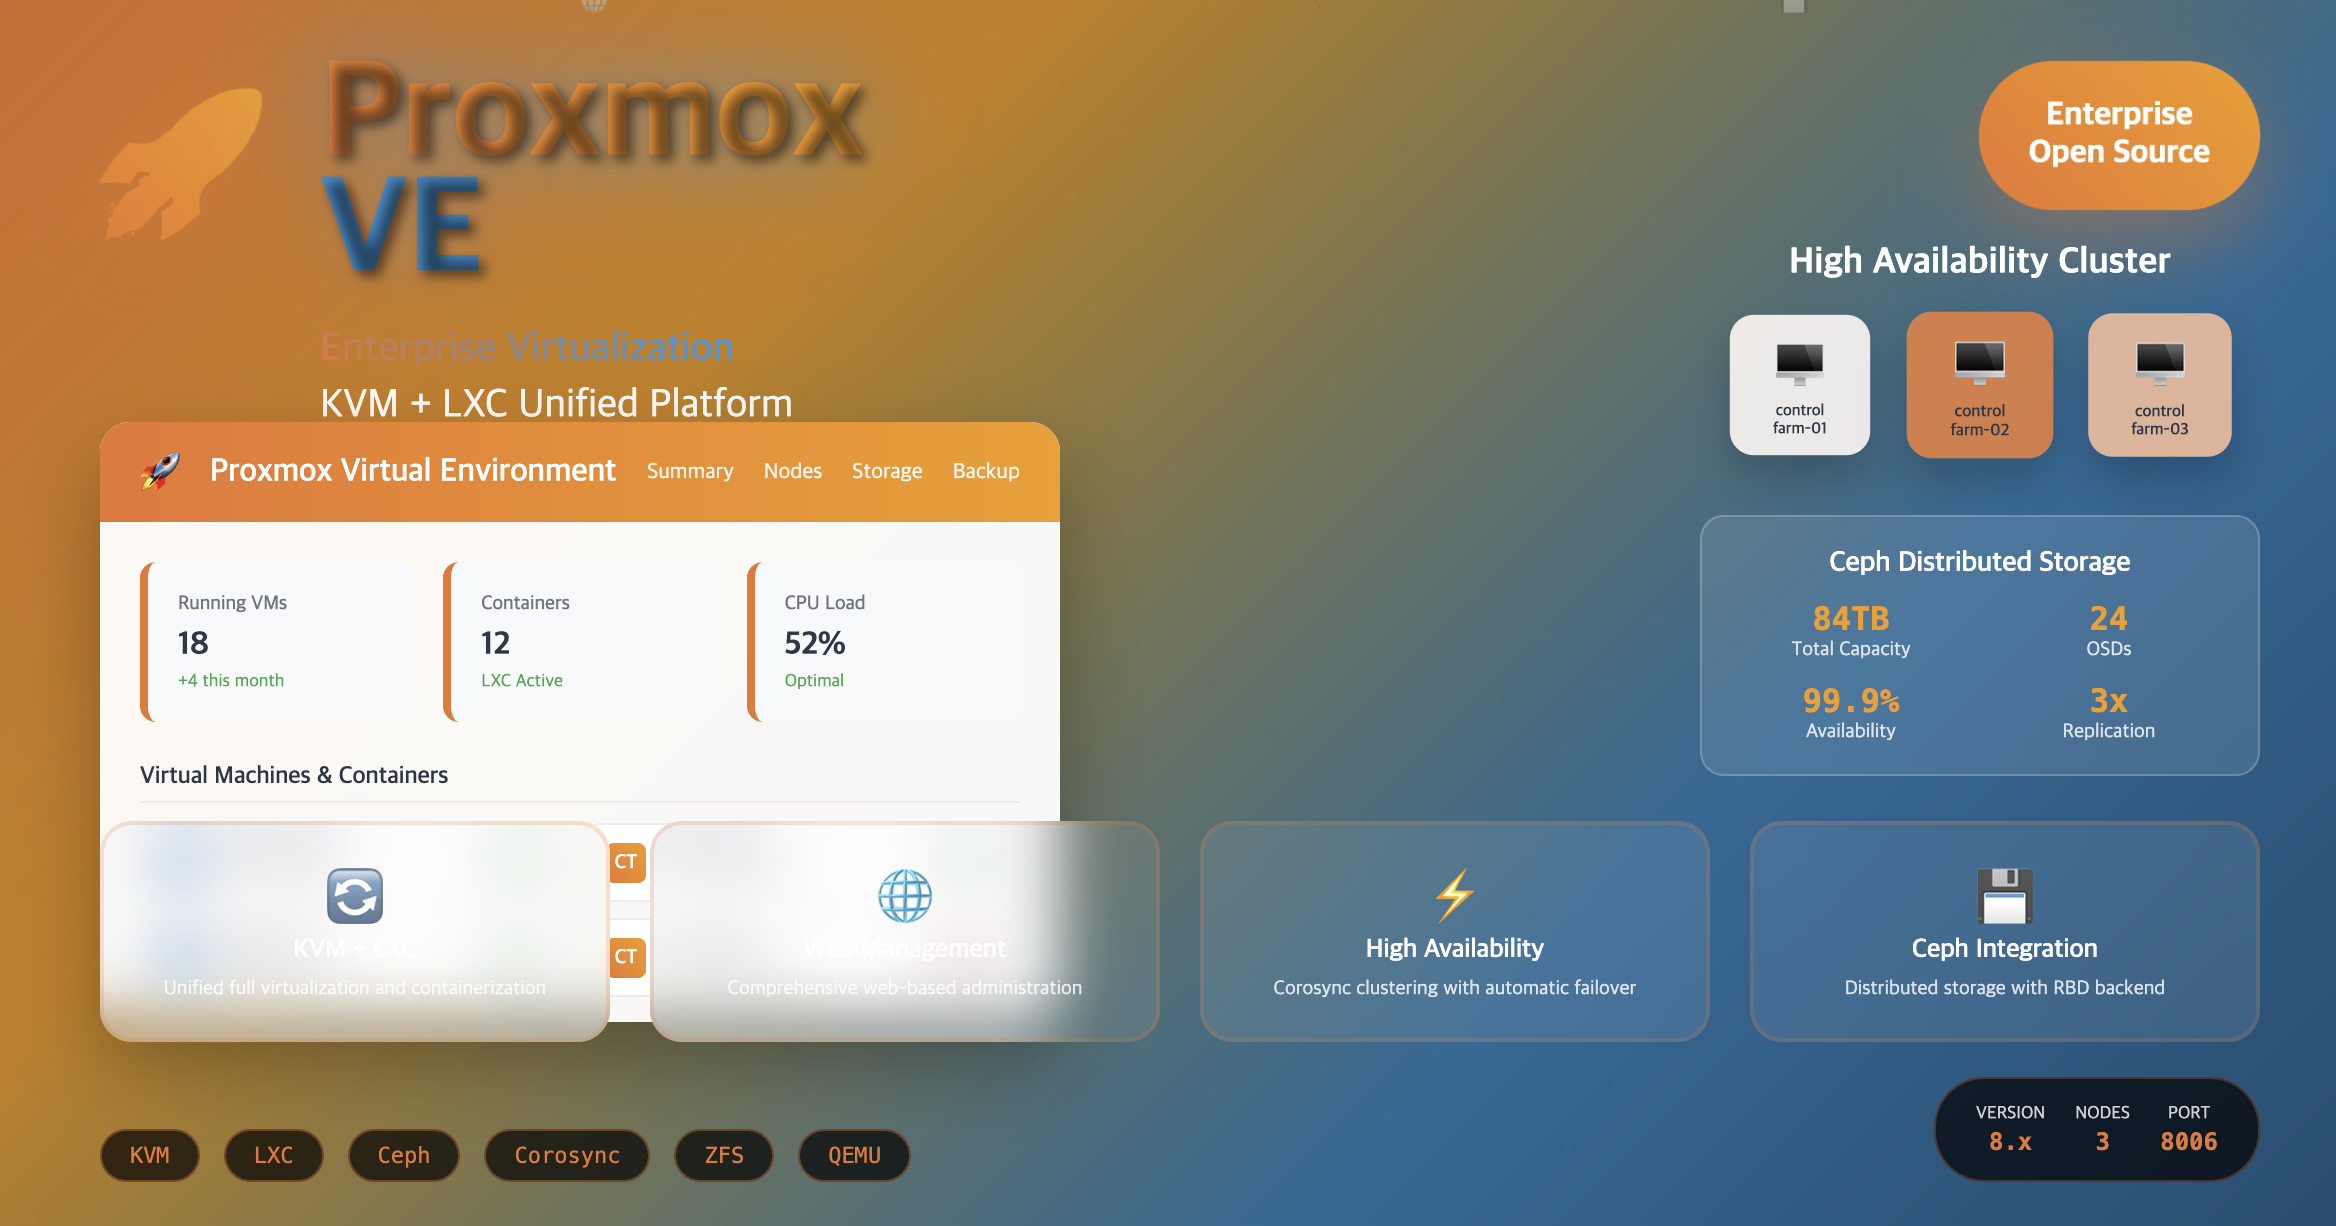
Proxmox VE (Virtual Environment) is a comprehensive open-source platform for enterprise virtualization that integrates KVM (Kernel-based Virtual Machine) and LXC (Linux Containers) with features like web-based management interface, high availability clustering, and Ceph storage integration.
This guide covers Proxmox VE concepts and key features, installation and network configuration, cluster setup with Ceph RBD integration, and web UI access methods.
What is Proxmox VE?
Proxmox VE (Virtual Environment) is a comprehensive open-source platform for enterprise virtualization. It integrates two virtualization technologies - KVM (Kernel-based Virtual Machine) for virtual machines and LXC (Linux Containers) for containerization - into a single management interface.
Proxmox VE provides a unified platform that combines the power of full virtualization (KVM) with the efficiency of containerization (LXC), all managed through an intuitive web interface.
Virtualization Technologies Integration
Key Features of Proxmox VE
Proxmox VE offers enterprise-grade features that make it suitable for production environments.
1. Dual Virtualization Technologies
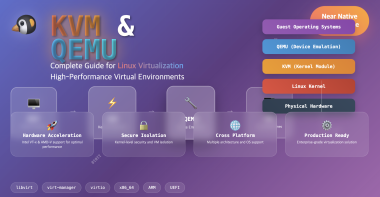
KVM (Kernel-based Virtual Machine)
- Full Virtualization: Complete virtual machines for various guest operating systems
- Guest OS Support: Linux, Windows, BSD, and other x86-based operating systems
- Hardware Acceleration: Leverages CPU virtualization extensions (VT-x/AMD-V)
- Performance: Near-native performance for compute-intensive workloads
LXC (Linux Containers)
- OS-level Virtualization: Lightweight containerization platform for Linux environments
- Resource Efficiency: Minimal overhead compared to full virtualization
- Rapid Deployment: Fast container creation and startup times
- Isolation: Secure process and resource isolation
2. Web-based Management Interface
Comprehensive Web UI features include:
| Management Area | Capabilities |
|---|---|
| VM/Container Management | Create, configure, start, stop, migrate virtual machines and containers |
| Storage Management | Configure and manage various storage backends (local, network, distributed) |
| Network Configuration | Set up bridges, VLANs, bonding, and complex network topologies |
| Cluster Operations | Multi-node cluster management and monitoring |
| User Management | Role-based access control and authentication integration |
3. High Availability Clustering
Cluster Features
- Multi-node Clustering: Support for multiple Proxmox nodes in a cluster
- Live Migration: Move running VMs between hosts without downtime
- Automatic Failover: Automatic VM restart on node failures
- Fence Management: Prevent split-brain scenarios with fencing mechanisms
- Quorum-based Decisions: Corosync-based cluster consensus
Cluster Requirements
# Essential cluster requirements
- Corosync cluster engine (UDP ports 5404, 5405)
- Time synchronization across all nodes
- SSH connectivity (TCP port 22) between nodes
- Identical Proxmox versions on all nodes
- Shared storage for HA functionality
4. Backup and Restore
Backup Capabilities
- Scheduled Backups: Automated backup scheduling for VMs and containers
- Multiple Formats: Support for various backup formats (VMA, tar)
- Incremental Backups: Efficient incremental and differential backups
- Storage Backends: Local and remote backup storage options
- Restore Flexibility: Full or file-level restore capabilities
Backup Configuration
# Backup job configuration
Schedule: Daily, Weekly, Monthly
Retention: Configurable retention policies
Compression: LZO, GZIP, ZSTD compression options
Notification: Email alerts for backup status
5. Storage Systems Support
Storage Backend Types
| Storage Type | Technology | Use Cases |
|---|---|---|
| Local Storage | LVM, Directory, ZFS | Single-node setups, development environments |
| Network Storage | NFS, CIFS/SMB | Shared storage for small to medium clusters |
| SAN Storage | iSCSI, Fibre Channel | Enterprise SAN environments |
| Distributed Storage | Ceph RBD, GlusterFS | Large-scale, high-availability deployments |
6. Advanced Networking
Network Configuration Options
- Bridge Networks: Standard VM networking with Linux bridges
- Bonding/LACP: Link aggregation for bandwidth and redundancy
- VLAN Support: 802.1Q VLAN tagging and trunk ports
- Software-Defined Networking: Integration with SDN solutions
- Firewall Integration: Built-in firewall with rule management
7. Security Features
Multi-Factor Authentication (MFA)
- Two-Factor Authentication: TOTP-based 2FA support
- Authentication Backends: LDAP, Active Directory integration
- Role-Based Access Control: Granular permission management
- SSL/TLS Encryption: Secure web interface and API access
Integrated Firewall
- VM/Container Firewalls: Individual firewall rules for each VM/container
- Cluster-wide Rules: Centralized firewall management
- Security Groups: Reusable firewall rule sets
- Logging and Monitoring: Comprehensive firewall activity logging
Proxmox VE Installation and Setup
This section covers the complete installation process, including prerequisites and initial configuration.
Pre-installation Requirements
Hardware Requirements
| Component | Minimum | Recommended |
|---|---|---|
| CPU | 64-bit CPU with VT-x/AMD-V | Multi-core CPU with hardware virtualization |
| Memory | 2 GB RAM | 8+ GB RAM (more for production) |
| Storage | 32 GB disk space | SSD with 100+ GB for optimal performance |
| Network | 1 GbE network interface | Multiple NICs for redundancy and performance |
Ceph Storage Integration
Existing Ceph Cluster Status
Before Proxmox installation, verify your Ceph cluster is operational:
# Check Ceph cluster status
sudo ceph -s
  cluster:
    id:     94b49042-6e27-48a8-b5dd-fe21631a0cd9
    health: HEALTH_WARN
            12 pool(s) have no replicas configured
            mons are allowing insecure global_id reclaim

  services:
    mon: 3 daemons, quorum ceph-farm-01,ceph-farm-02,ceph-farm-03 (age 20h)
    mgr: ceph-farm-02(active, since 24h), standbys: ceph-farm-01, ceph-farm-03
    osd: 24 osds: 24 up (since 24h), 24 in (since 24h)
    rgw: 3 daemons active (ceph-farm-01.rgw0, ceph-farm-02.rgw0, ceph-farm-03.rgw0)

  data:
    pools:   12 pools, 1064 pgs
    objects: 660 objects, 1.6 GiB
    usage:   26 GiB used, 84 TiB / 84 TiB avail
    pgs:     1064 active+clean
Ceph Storage Utilization
# Check Ceph storage utilization
sudo ceph df
RAW STORAGE:
    CLASS     SIZE       AVAIL      USED        RAW USED     %RAW USED
    hdd       84 TiB     84 TiB     1.9 GiB       26 GiB          0.03
    TOTAL     84 TiB     84 TiB     1.9 GiB       26 GiB          0.03

POOLS:
    POOL                          ID     PGS     STORED      OBJECTS     USED        %USED     MAX AVAIL
    kube                           1     128         0 B           0         0 B         0        80 TiB
    images                         2     256         0 B           0         0 B         0        80 TiB
    volumes                        3     256         0 B           0         0 B         0        80 TiB
    backups                        4       8         0 B           0         0 B         0        80 TiB
    vms                            5      16         0 B           0         0 B         0        80 TiB
    .rgw.root                      6      32     3.5 KiB           8     512 KiB         0        80 TiB
    default.rgw.control            7      32         0 B           8         0 B         0        80 TiB
    default.rgw.buckets.index      8      16         0 B           0         0 B         0        80 TiB
    default.rgw.meta               9      32         0 B           0         0 B         0        80 TiB
    default.rgw.buckets.data      10     128         0 B           0         0 B         0        80 TiB
    default.rgw.log               11      32         0 B         207         0 B         0        80 TiB
    proxmox                       13     128     1.6 GiB         437     1.6 GiB         0        80 TiB

# Verify Proxmox storage status
pvesm status
Name             Type     Status           Total            Used       Available        %
ceph-rbd          rbd     active     85474777145         1660985     85473116160    0.00%
local             dir     active        98559220         3690584        89819088    3.74%
local-lvm     lvmthin     active       794079232               0       794079232    0.00%
Storage Pool Allocation:
- kube ~ default.rgw.log: 11 existing pools for shared usage
- proxmox pool: Dedicated pool for Proxmox control server
- ceph-rbd storage: Primary storage backend for Proxmox VMs
Network Configuration
Proper network configuration is crucial for Proxmox cluster operations and VM connectivity.
Network Architecture Overview
Network Summary
| Network | VLAN | Bridge | Purpose |
|---|---|---|---|
| Management | 162 | vmbr0 | Proxmox management and cluster communication |
| Tenant | 153 | vmbr1 | VM tenant networks and application traffic |
| Ceph Public | 154 | vmbr2 | Ceph client-to-cluster communication |
| Ceph Cluster | 155 | - | Ceph internal cluster communication |
| Provider | 209 | vmbr3 | External provider networks |
Host Network Configuration
IP Address Allocation
| Host | Management | Tenant | Provider | Ceph Public |
|---|---|---|---|---|
| control-farm-01 | 192.168.162.227 | 192.168.153.227 | 192.168.209.227 | 192.168.154.227 |
| control-farm-02 | 192.168.162.228 | 192.168.153.228 | 192.168.209.228 | 192.168.154.228 |
| control-farm-03 | 192.168.162.229 | 192.168.153.229 | 192.168.209.229 | 192.168.154.229 |
High Availability IPs:
- Keepalived VIP (Proxmox Cluster): 192.168.162.230
- Keepalived VIP (Ceph RGW): 192.168.162.200
Bonding Configuration
Active-Backup Bonding Setup
# Check bonding status
cat /proc/net/bonding/bond0
Ethernet Channel Bonding Driver: v3.7.1 (April 27, 2011)

Bonding Mode: fault-tolerance (active-backup)
Primary Slave: None
Currently Active Slave: ens1f0np0
MII Status: up
MII Polling Interval (ms): 100
Up Delay (ms): 200
Down Delay (ms): 200

Slave Interface: ens1f0np0
MII Status: up
Speed: 25000 Mbps
Duplex: full
Link Failure Count: 0
Permanent HW addr: bc:97:e1:73:1c:60

Slave Interface: ens2f0np0
MII Status: up
Speed: 25000 Mbps
Duplex: full
Link Failure Count: 0
Permanent HW addr: bc:97:e1:73:6c:10
Bonding Configuration:
- Interfaces: ens1f0np0 (active), ens2f0np0 (standby)
- Mode: active-backup for fault tolerance
- Bandwidth: 25 Gbps per interface
Network Interface Configuration
/etc/network/interfaces Configuration
# Physical interfaces
auto ens1f0np0
iface ens1f0np0 inet manual

auto ens2f0np0
iface ens2f0np0 inet manual

# Bond interface
auto bond0
iface bond0 inet manual
        bond-slaves ens1f0np0 ens2f0np0
        bond-miimon 100
        bond-mode active-backup
        bond-downdelay 200
        bond-updelay 200

# VLAN interfaces
auto bond0.162
iface bond0.162 inet manual

auto bond0.153
iface bond0.153 inet manual

auto bond0.154
iface bond0.154 inet manual

auto bond0.209
iface bond0.209 inet manual

# Bridge interfaces
auto vmbr0
iface vmbr0 inet static
        address 192.168.162.227/24
        gateway 192.168.162.1
        bridge-ports bond0.162
        bridge-stp off
        bridge-fd 0

auto vmbr1
iface vmbr1 inet static
        address 192.168.153.227/24
        bridge-ports bond0.153
        bridge-stp off
        bridge-fd 0

auto vmbr2
iface vmbr2 inet static
        address 192.168.154.227/24
        bridge-ports bond0.154
        bridge-stp off
        bridge-fd 0

auto vmbr3
iface vmbr3 inet static
        address 192.168.209.227/24
        bridge-ports bond0.209
        bridge-stp off
        bridge-fd 0
Cluster Setup and Configuration
Building a high-availability Proxmox cluster with proper quorum and failover capabilities.
Cluster Architecture
Cluster Nodes
- control-farm-01: Primary cluster node
- control-farm-02: Secondary cluster node
- control-farm-03: Tertiary cluster node
Cluster Requirements
- Corosync cluster engine: UDP ports 5404, 5405 communication required
- Time synchronization: NTP/Chrony synchronization across all nodes
- SSH connectivity: TCP port 22, SSH tunnels between nodes
- Version consistency: Identical Proxmox versions on all nodes
- Network reliability: Stable, low-latency network connections
Step 1: Create Initial Cluster
Initialize Cluster on Primary Node
# Create cluster on control-farm-01
pvecm create server-farm
Corosync Cluster Engine Authentication key generator.
Gathering 2048 bits for key from /dev/urandom.
Writing corosync key to /etc/corosync/authkey.
Writing corosync config to /etc/pve/corosync.conf
Restart corosync and cluster filesystem

# Verify cluster status
pvecm status
Cluster information
-------------------
Name:             server-farm
Config Version:   1
Transport:        knet
Secure auth:      on

Quorum information
------------------
Date:             Fri Jul 23 15:09:08 2021
Quorum provider:  corosync_votequorum
Nodes:            1
Node ID:          0x00000001
Ring ID:          1.5
Quorate:          Yes

Votequorum information
----------------------
Expected votes:   1
Highest expected: 1
Total votes:      1
Quorum:           1
Flags:            Quorate

Membership information
----------------------
    Nodeid      Votes Name
0x00000001          1 192.168.162.227 (local)
Step 2: Add Additional Nodes
Join Second Node to Cluster
# On control-farm-02, join the existing cluster
pvecm add 192.168.162.227
Please enter superuser (root) password for '192.168.162.227': *********
Establishing API connection with host '192.168.162.227'
The authenticity of host '192.168.162.227' can't be established.
X509 SHA256 key fingerprint is 26:F3:44:E8:B7:A4:C8:70:A3:BD:AC:03:05:5A:17:5C:F0:61:48:BC:27:59:F9:FB:AD:96:B8:7C:4E:01:03:4A.
Are you sure you want to continue connecting (yes/no)? yes
Login succeeded.
check cluster join API version
No cluster network links passed explicitly, fallback to local node IP '192.168.162.228'
Request addition of this node
Join request OK, finishing setup locally
stopping pve-cluster service
backup old database to '/var/lib/pve-cluster/backup/config-1627020747.sql.gz'
waiting for quorum...OK
(re)generate node files
generate new node certificate
merge authorized SSH keys and known hosts
generated new node certificate, restart pveproxy and pvedaemon services
successfully added node 'control-farm-02' to cluster.

# Verify two-node cluster status
pvecm status
Cluster information
-------------------
Name:             server-farm
Config Version:   2
Transport:        knet
Secure auth:      on

Quorum information
------------------
Date:             Fri Jul 23 15:12:50 2021
Quorum provider:  corosync_votequorum
Nodes:            2
Node ID:          0x00000002
Ring ID:          1.9
Quorate:          Yes

Votequorum information
----------------------
Expected votes:   2
Highest expected: 2
Total votes:      2
Quorum:           2
Flags:            Quorate

Membership information
----------------------
    Nodeid      Votes Name
0x00000001          1 192.168.162.227
0x00000002          1 192.168.162.228 (local)
Add Third Node for Full Quorum
# On control-farm-03, join the cluster
pvecm add 192.168.162.227

# Final cluster status with all three nodes
pvecm status
Membership information
----------------------
    Nodeid      Votes Name
0x00000001          1 192.168.162.227
0x00000002          1 192.168.162.228
0x00000003          1 192.168.162.229 (local)
Ceph RBD Storage Integration
Integrate Proxmox with existing Ceph cluster for distributed storage capabilities.
Ceph Client Configuration
When installing Ceph, ensure Proxmox nodes are included as Ceph clients during the initial cluster setup for proper integration.
Step 1: Configure Storage Backend
Modify Storage Configuration
# Edit Proxmox storage configuration
sudo vi /etc/pve/storage.cfg

# Add Ceph RBD storage configuration
rbd: ceph-rbd
        content images
        krbd 0
        monhost 192.168.154.151 192.168.154.152 192.168.154.153
        pool proxmox
        username admin
Configuration Parameters:
- content: images (VM disk images)
- krbd: 0 (use userspace RBD)
- monhost: Ceph monitor IP addresses
- pool: Dedicated Proxmox pool
- username: Ceph client username
Step 2: Configure Authentication
Copy Ceph Admin Keyring
# Copy Ceph admin keyring for Proxmox access
cp /etc/ceph/ceph.client.admin.keyring /etc/pve/priv/ceph/ceph-rbd.keyring

# Verify keyring permissions
ls -la /etc/pve/priv/ceph/
total 8
drwx------ 2 root www-data  80 Jul 23 15:30 .
drwx------ 8 root www-data 200 Jul 23 15:20 ..
-rw------- 1 root www-data  63 Jul 23 15:30 ceph-rbd.keyring
Step 3: Verify Storage Integration
Check Storage Status
# Verify Ceph storage is active in Proxmox
pvesm status
Name             Type     Status           Total            Used       Available        %
ceph-rbd          rbd     active     85474777145         1660985     85473116160    0.00%
local             dir     active        98559220         3691608        89818064    3.75%
local-lvm     lvmthin     active       794079232               0       794079232    0.00%
Storage Backend Verification
| Storage Name | Type | Status | Total (MB) | Available (MB) |
|---|---|---|---|---|
| ceph-rbd | rbd | active | 85,474,777,145 | 85,473,116,160 |
| local | dir | active | 98,559,220 | 89,818,064 |
| local-lvm | lvmthin | active | 794,079,232 | 794,079,232 |
Web Interface Access and Management
Access and configure Proxmox through its comprehensive web-based management interface.
Web UI Access
Connection Information
- Web Interface URL:
https://192.168.162.230:8006/ - Default Port: 8006 (HTTPS)
- High Availability: Keepalived VIP for cluster access
- SSL Certificate: Self-signed (can be replaced with custom certificates)
If you can successfully access the web interface at the above URL, your Proxmox installation is complete and functional.
Initial Web UI Configuration
First Login Setup
- Accept SSL Certificate: Add security exception for self-signed certificate
- Login Credentials: Use root account with installation password
- Subscription Notice: Acknowledge subscription notification (optional for community use)
- Initial Dashboard: Review cluster status and resource utilization
Web Interface Features
- Node Management: View and manage cluster nodes
- VM/Container Operations: Create, configure, and manage virtual machines and containers
- Storage Management: Monitor and configure storage backends
- Network Configuration: Manage network interfaces and bridges
- Backup Operations: Schedule and monitor backup jobs
- User Management: Configure users, groups, and permissions
Advanced Configuration
Additional configurations for production environments and specific use cases.
Nested Virtualization Support
For environments requiring nested virtualization (VM within VM scenarios):
Worker nodes that need to run nested virtualization must have Enable Nested Virtualization in KVM configured on the host system.
CPU Configuration for Nested VMs
- Set CPU type to ‘host’ in VM configuration
- Configure CPU as: “Processors 32 (4 socket, 8 cores) [host]”
- Enable all CPU flags for maximum compatibility
Reference: Enable Nested Virtualization in KVM Guide
Performance Optimization
CPU Configuration
Optimal CPU allocation for VMs
- Use CPU type ‘host’ for best performance
- Enable NUMA awareness for large VMs
- Configure CPU affinity for critical workloads
- Balance CPU allocation across cluster nodes
Memory Management
Memory optimization settings
- Enable memory ballooning for dynamic allocation
- Configure appropriate memory limits
- Use hugepages for memory-intensive applications
- Monitor memory usage and adjust as needed
Storage Performance
- Use Ceph RBD for distributed storage
- Configure appropriate RBD cache settings
- Use SSD storage for Ceph journals/WAL
- Optimize Ceph placement groups (PGs)
Security Hardening
Firewall Configuration
- Configure cluster-wide firewall rules
- Set up VM-specific firewall policies
- Enable logging for security monitoring
- Regular security rule audits
User Access Control
- Create role-based access groups
- Implement least-privilege principles
- Regular user access reviews
- Multi-factor authentication setup
Monitoring and Maintenance
Essential monitoring and maintenance procedures for Proxmox clusters.
Cluster Health Monitoring
Regular Health Checks
# Cluster status monitoring
pvecm status          # Cluster membership and quorum
pvecm nodes           # Node status and details
pveversion            # Version information
pvesm status          # Storage backend status
Resource Monitoring
# Resource utilization checks
pveperf               # Performance test
iostat -x 1           # I/O statistics
iftop                 # Network monitoring
htop                  # CPU and memory usage
Backup and Recovery Procedures
Automated Backup Configuration
- Set up backup schedules for critical VMs
- Configure backup retention policies
- Test backup restoration procedures
- Monitor backup job success rates
Disaster Recovery Planning
- Document recovery procedures
- Test failover scenarios
- Maintain off-site backup copies
- Regular DR plan updates
Key Points
-
Unified Virtualization Platform
- Integrates KVM full virtualization and LXC containerization
- Web-based management interface for comprehensive control
- High availability clustering with automatic failover
- Enterprise-grade backup and disaster recovery features -
Storage and Network Integration
- Multiple storage backend support (local, network, distributed)
- Seamless Ceph RBD integration for distributed storage
- Advanced networking with VLAN, bonding, and SDN support
- Integrated firewall and security management -
Production Readiness
- Corosync-based clustering for high availability
- Role-based access control and multi-factor authentication
- Comprehensive monitoring and alerting capabilities
- Open-source with commercial support options available
Conclusion
Proxmox VE represents a powerful open-source virtualization platform that successfully integrates KVM-based virtualization and LXC containerization into a unified management experience. Its web-based interface, high availability clustering, and Ceph storage integration make it suitable for enterprise environments requiring robust virtualization infrastructure.
The platform’s ability to combine full virtualization and containerization provides flexibility for diverse workload requirements, while enterprise features like clustering, backup systems, and security controls ensure production readiness.
Key Implementation Benefits
- Unified Management: Single interface for both VMs and containers
- High Availability: Clustering with automatic failover capabilities
- Storage Flexibility: Multiple backend options including distributed storage
- Cost Effectiveness: Open-source with no licensing restrictions
- Enterprise Features: Security, backup, and monitoring capabilities
Future Considerations
As containerization and cloud-native architectures continue evolving, Proxmox VE’s dual approach of supporting both traditional virtualization and modern containerization positions it well for hybrid infrastructure requirements. The platform’s active development community and commercial support options ensure continued innovation and enterprise reliability.
For organizations seeking a comprehensive, open-source virtualization platform that combines the power of KVM with the efficiency of LXC, Proxmox VE provides an excellent foundation for building scalable, reliable virtual infrastructure.

Comments