20 min to read
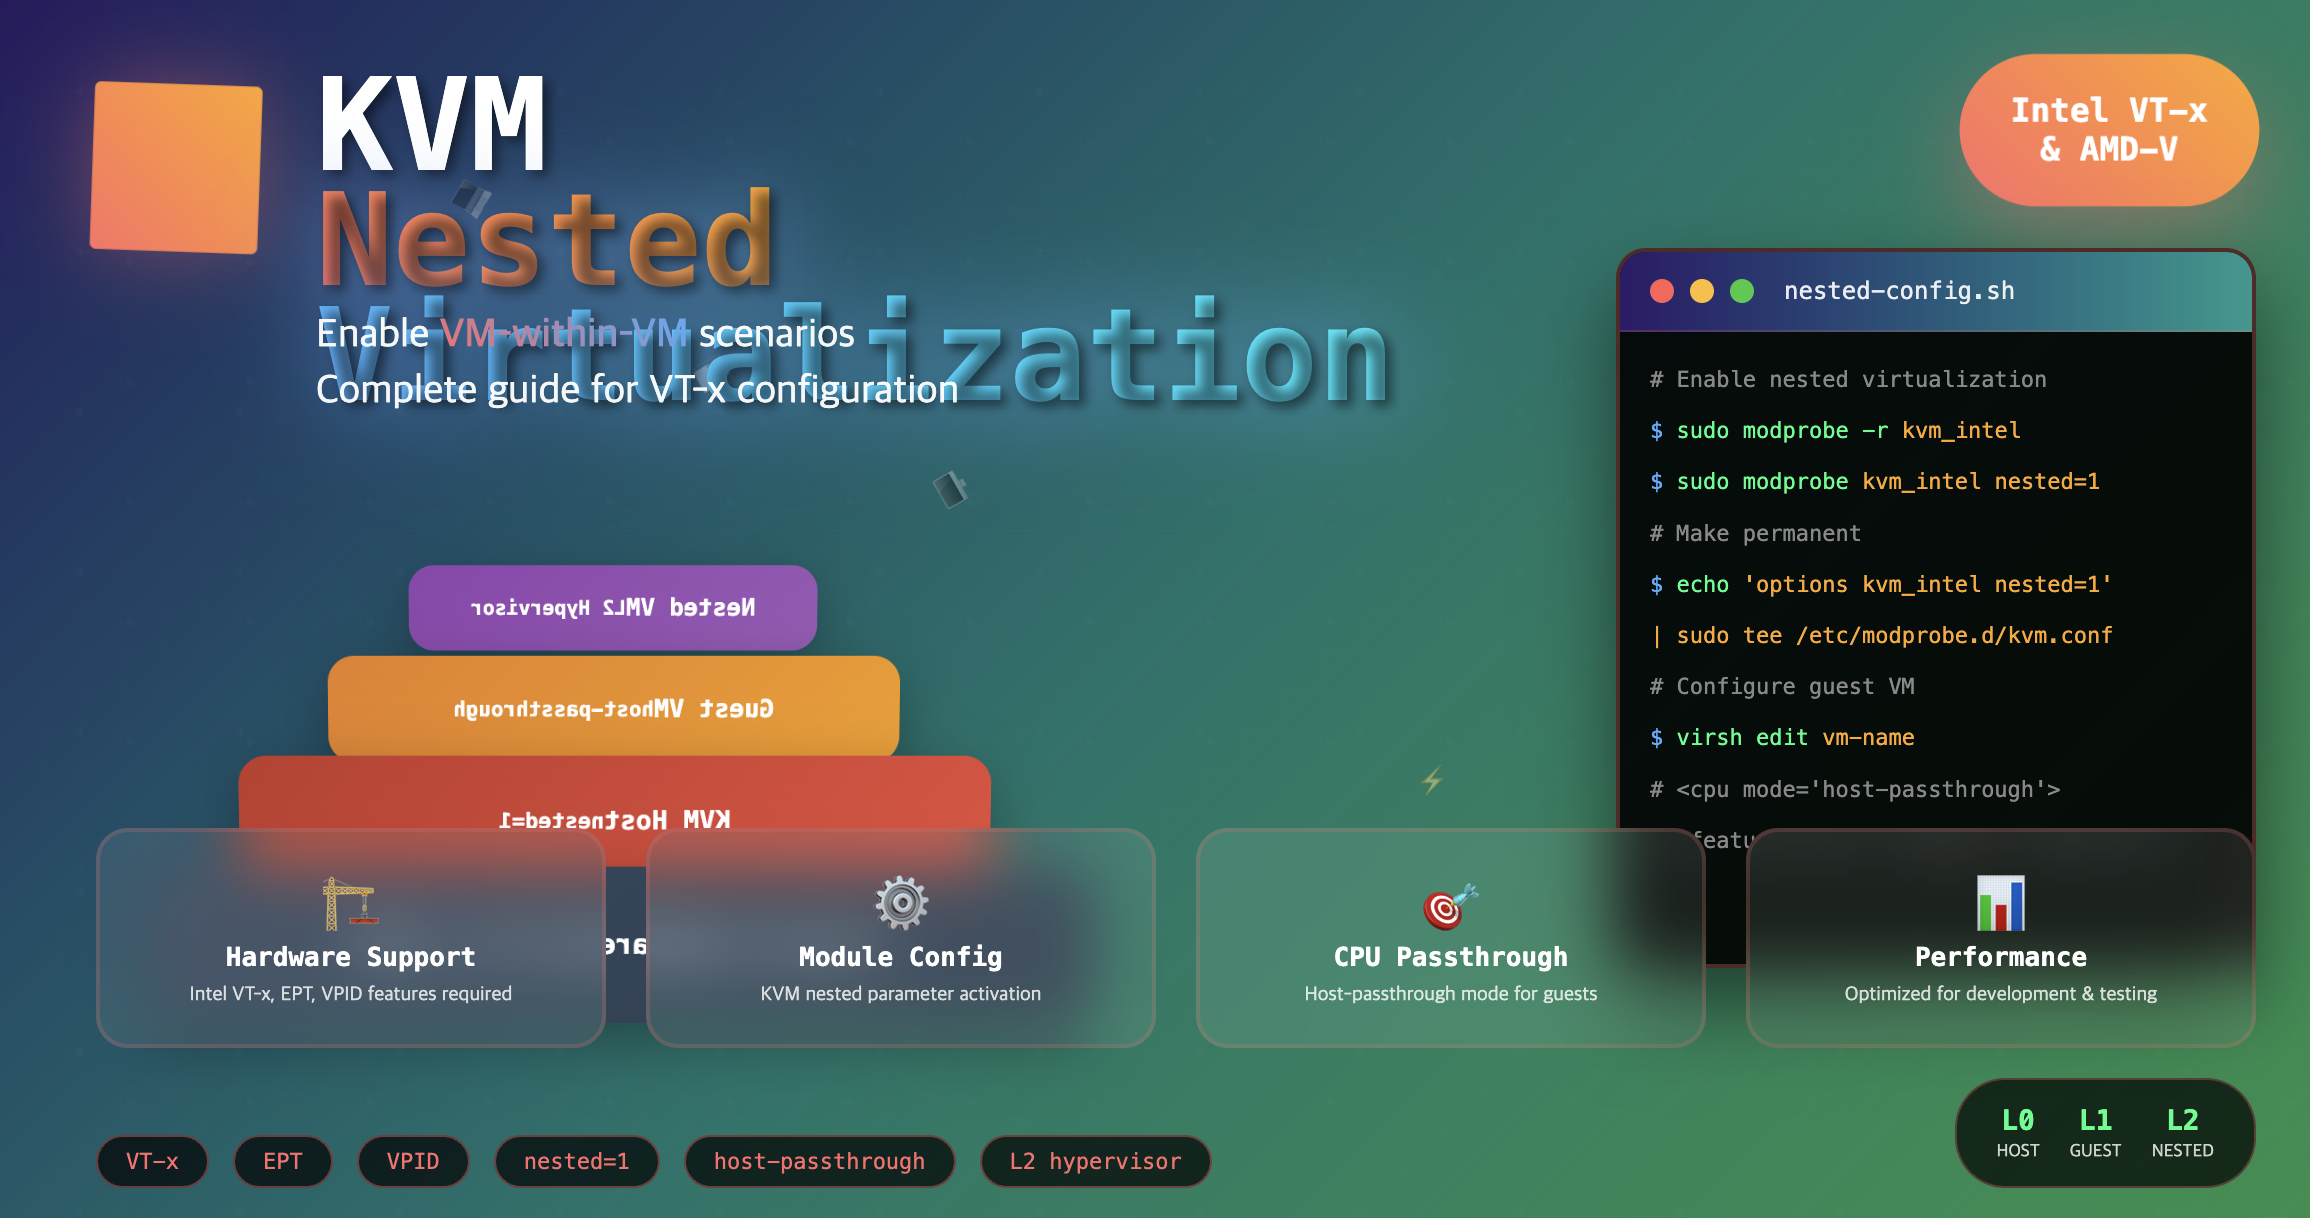
KVM Nested Virtualization Complete Guide
Enable and configure nested virtualization in KVM for advanced virtual environments
Overview
Nested Virtualization in KVM (Kernel-based Virtual Machine) is a feature that allows running virtual machines (VMs) inside other VMs.
This capability is particularly useful for testing virtualization environments, CI/CD pipelines, cloud platform testing, and development environment setup.
This comprehensive guide provides step-by-step instructions for enabling nested virtualization on KVM hosts and configuring guest VMs to support virtualization features.
We’ll cover everything from BIOS configuration to performance optimization and troubleshooting.
Related Articles
- KVM and QEMU Guide - Linux Virtualization Solutions
- Libvirt Complete Guide - Linux Virtualization Management Tool
Understanding VT-x (Intel Virtualization Technology)
Before diving into nested virtualization setup, it’s essential to understand the underlying hardware virtualization technology.
What is VT-x?
VT-x (Intel Virtualization Technology) is a hardware virtualization technology provided by Intel CPUs that enables guest operating systems to directly access hardware resources with minimal performance overhead.
VT-x provides hardware-assisted virtualization by extending the CPU with special instructions and capabilities that make virtualization more efficient and secure.
Key VT-x Components
| Component | Description |
|---|---|
| VMX (Virtual Machine Extensions) | CPU extension instructions for virtualization operations |
| EPT (Extended Page Tables) | Hardware-assisted memory virtualization for improved performance |
| VPID (Virtual Processor ID) | Reduces TLB flush overhead in virtualized environments |
| VT-d | I/O device virtualization support for direct device access |
BIOS/UEFI Configuration for VT-x
Proper BIOS/UEFI configuration is the foundation for nested virtualization support.
Accessing BIOS/UEFI Settings
1. Enter BIOS/UEFI Setup
# During system boot, press:
# - F2, F12, or Del key (manufacturer-specific)
# - Some systems: F1, F10, or Esc
# - UEFI systems may require holding Shift while clicking Restart
2. Locate VT-x Settings
Common menu locations for VT-x settings:
- Advanced → CPU Configuration → Intel Virtualization Technology
- Processor → Intel VT-x
- Security → Virtualization → VT-x
- Chipset → North Bridge → Intel VT-x
3. Required Settings Configuration
| Setting | Required Value | Purpose |
|---|---|---|
| Intel VT-x Technology | [Enabled] | Core virtualization support |
| Intel VT-d Technology | [Enabled] | I/O virtualization and device passthrough |
| Execute Disable Bit | [Enabled] | Security feature for memory protection |
| Hyper-Threading | [Enabled] | Enhanced CPU utilization (optional) |
- Save settings and reboot after making changes
- Some systems require Secure Boot to be disabled for nested virtualization
- AMD systems use AMD-V instead of VT-x with similar configuration steps
Verifying CPU Virtualization Support
Before enabling nested virtualization, verify that your system supports the necessary hardware features.
Check CPU Virtualization Capabilities
Complete CPU Information Check
# Display detailed CPU information
$ lscpu
Architecture:        x86_64
CPU op-mode(s):      32-bit, 64-bit
Byte Order:          Little Endian
Address sizes:       46 bits physical, 48 bits virtual
CPU(s):              72
On-line CPU(s) list: 0-71
Thread(s) per core:  2
Core(s) per socket:  18
Socket(s):           2
NUMA node(s):        2
Vendor ID:           GenuineIntel
CPU family:          6
Model:               79
Model name:          Intel(R) Xeon(R) CPU E5-2697 v4 @ 2.30GHz
Stepping:            1
CPU MHz:             1367.142
CPU max MHz:         3600.0000
CPU min MHz:         1200.0000
BogoMIPS:            4594.55
Virtualization:      VT-x
L1d cache:           32K
L1i cache:           32K
L2 cache:            256K
L3 cache:            46080K
NUMA node0 CPU(s):   0-17,36-53
NUMA node1 CPU(s):   18-35,54-71
Flags:               fpu vme de pse tsc msr pae mce cx8 apic sep mtrr pge mca cmov pat pse36 clflush dts acpi mmx fxsr sse sse2 ss ht tm pbe syscall nx pdpe1gb rdtscp lm constant_tsc arch_perfmon pebs bts rep_good nopl xtopology nonstop_tsc cpuid aperfmperf pni pclmulqdq dtes64 monitor ds_cpl vmx smx est tm2 ssse3 sdbg fma cx16 xtpr pdcm pcid dca sse4_1 sse4_2 x2apic movbe popcnt tsc_deadline_timer aes xsave avx f16c rdrand lahf_lm abm 3dnowprefetch cpuid_fault epb cat_l3 cdp_l3 invpcid_single pti intel_ppin tpr_shadow vnmi flexpriority ept vpid ept_ad fsgsbase tsc_adjust bmi1 hle avx2 smep bmi2 erms invpcid rtm cqm rdt_a rdseed adx smap intel_pt xsaveopt cqm_llc cqm_occup_llc cqm_mbm_total cqm_mbm_local dtherm ida arat pln pts
Key Items to Verify
- Virtualization: VT-x (Intel) or AMD-V (AMD)
- Flags containing 'vmx' (Intel) or 'svm' (AMD)
- Additional flags: ept, vpid, vnmi, flexpriority
Quick Virtualization Check
# Check for virtualization support
$ egrep --color -i "svm|vmx" /proc/cpuinfo
flags: ... vmx smx ... vnmi flexpriority ept vpid ...

# Alternative check
$ grep -E "(vmx|svm)" /proc/cpuinfo
KVM Module Configuration on Host
Proper KVM module configuration is essential for enabling nested virtualization support.
Check Current KVM Module Status
Verify Loaded Modules
# Check currently loaded KVM modules
$ lsmod | grep kvm
Expected output when properly loaded:
kvm_intel             487424  18
kvm                  1404928  13 kvm_intel
irqbypass              12288  1 kvm
Output when modules are not loaded:
$ lsmod | grep kvm
# (no output)
Module Information Check
# Check KVM Intel module information
$ modinfo kvm_intel | grep -i nested
parm:           nested_early_check:bool
parm:           nested:bool

# Check KVM AMD module information
$ modinfo kvm_amd | grep -i nested
parm:           nested:bool
Enable Nested Virtualization Temporarily
Unload Existing KVM Modules
For Intel Systems:
# Remove Intel KVM module
$ sudo modprobe -r kvm_intel

# Verify removal
$ lsmod | grep kvm_intel
# (should show no output)
For AMD Systems:
# Remove AMD KVM module
$ sudo modprobe -r kvm_amd

# Verify removal
$ lsmod | grep kvm_amd
# (should show no output)
Reload Modules with Nested Support
For Intel Systems:
# Load Intel KVM module with nested virtualization
$ sudo modprobe kvm_intel nested=1

# Verify nested support is enabled
$ cat /sys/module/kvm_intel/parameters/nested
Y
For AMD Systems:
# Load AMD KVM module with nested virtualization
$ sudo modprobe kvm_amd nested=1

# Verify nested support is enabled
$ cat /sys/module/kvm_amd/parameters/nested
Y
Enable Nested Virtualization Permanently
Create Persistent Configuration
To make nested virtualization permanent across reboots, create a module configuration file:
# Create or edit KVM configuration file
$ sudo vi /etc/modprobe.d/kvm.conf
For Intel hosts, add:
options kvm_intel nested=1
For AMD hosts, add:
options kvm_amd nested=1
Apply Configuration
# Update initramfs (Ubuntu/Debian)
$ sudo update-initramfs -u

# Update initramfs (CentOS/RHEL/Fedora)
$ sudo dracut -f

# Reboot to apply changes permanently
$ sudo reboot
Verify Permanent Configuration
# After reboot, check nested support
$ cat /sys/module/kvm_intel/parameters/nested
Y

# Verify module parameters
$ modinfo kvm_intel | grep nested
Guest VM Nested Virtualization Configuration
Configure guest VMs to support nested virtualization through CPU passthrough and feature enabling.
Method A: Using virsh CLI
Edit VM Configuration
# Access virsh interactive shell
$ virsh
virsh # list --all
 Id    Name                           State
----------------------------------------------------
 -     ubuntu-guest                   shut off
 -     windows-guest                  shut off

# Edit VM configuration
virsh # edit ubuntu-guest
Configure CPU for Nested Virtualization
Replace the existing CPU configuration with:
<cpu mode='host-passthrough' check='none'>
  <feature policy='require' name='vmx'/>
</cpu>
For AMD systems, use:
<cpu mode='host-passthrough' check='none'>
  <feature policy='require' name='svm'/>
</cpu>
Save and Restart VM
# In virsh shell
virsh # shutdown ubuntu-guest
virsh # start ubuntu-guest
Method B: Using Virt-Manager GUI
Step-by-Step GUI Configuration
- Open Virt-Manager
$ virt-manager - Access VM Details
- Right-click on the target VM
- Select “Open” → “Details”
- Configure Processor Settings
- Navigate to “Processor” tab
- Set CPU mode to “host-passthrough”
- Check “Copy host CPU configuration”
- Apply and Restart
- Click “Apply”
- Restart the VM
Advanced CPU Configuration
Comprehensive Feature Set
<cpu mode='host-passthrough' check='none' migratable='on'>
  <feature policy='require' name='vmx'/>
  <feature policy='require' name='ept'/>
  <feature policy='require' name='vpid'/>
  <feature policy='require' name='unrestricted_guest'/>
  <feature policy='require' name='flexpriority'/>
  <feature policy='require' name='vnmi'/>
</cpu>
CPU Topology Configuration
<cpu mode='host-passthrough'>
  <topology sockets='1' cores='4' threads='2'/>
  <feature policy='require' name='vmx'/>
</cpu>
Verifying Nested Virtualization in Guest VM
Confirm that nested virtualization is properly enabled within the guest VM.
Check Virtualization Support in Guest
Verify VT-x Features
# Inside the guest VM, check for virtualization flags
$ egrep --color -i "svm|vmx" /proc/cpuinfo
flags: fpu vme de pse tsc msr pae mce cx8 apic sep mtrr pge mca cmov pat pse36 clflush dts acpi mmx fxsr sse sse2 ss ht tm pbe syscall nx pdpe1gb rdtscp lm constant_tsc arch_perfmon pebs bts rep_good nopl xtopology nonstop_tsc cpuid aperfmperf pni pclmulqdq dtes64 monitor ds_cpl vmx smx est tm2 ssse3 sdbg fma cx16 xtpr pdcm pcid dca sse4_1 sse4_2 x2apic movbe popcnt tsc_deadline_timer aes xsave avx f16c rdrand lahf_lm abm 3dnowprefetch cpuid_fault epb cat_l3 cdp_l3 invpcid_single pti intel_ppin tpr_shadow vnmi flexpriority ept vpid ept_ad fsgsbase tsc_adjust bmi1 hle avx2 smep bmi2 erms invpcid rtm cqm rdt_a rdseed adx smap intel_pt xsaveopt cqm_llc cqm_occup_llc cqm_mbm_total cqm_mbm_local dtherm ida arat pln pts
Check KVM Module in Guest
# Install KVM in guest VM (if not already installed)
$ sudo apt update && sudo apt install -y qemu-kvm libvirt-daemon-system

# Check nested virtualization support
$ cat /sys/module/kvm_intel/parameters/nested
Y

# Verify KVM module is loaded
$ lsmod | grep kvm
kvm_intel             487424  0
kvm                  1404928  1 kvm_intel
Test Nested VM Creation
Performance Optimization for Nested Virtualization
Optimize nested virtualization performance through proper CPU, memory, and I/O configuration.
CPU Performance Optimization
NUMA-Aware Configuration
<cpu mode='host-passthrough'>
  <numa>
    <cell id='0' cpus='0-7' memory='8388608' unit='KiB'/>
  </numa>
  <feature policy='require' name='vmx'/>
</cpu>
CPU Pinning for Performance
<vcpu placement='static' cpuset='0-7'>8</vcpu>
<cputune>
  <vcpupin vcpu='0' cpuset='0'/>
  <vcpupin vcpu='1' cpuset='1'/>
  <vcpupin vcpu='2' cpuset='2'/>
  <vcpupin vcpu='3' cpuset='3'/>
  <vcpupin vcpu='4' cpuset='4'/>
  <vcpupin vcpu='5' cpuset='5'/>
  <vcpupin vcpu='6' cpuset='6'/>
  <vcpupin vcpu='7' cpuset='7'/>
</cputune>
Hyper-Threading Considerations
# Check hyper-threading status
$ lscpu | grep "Thread(s) per core"
Thread(s) per core:  2

# For optimal performance, use only physical cores
<vcpu placement='static' cpuset='0,2,4,6'>4</vcpu>
Memory Optimization
Huge Pages Configuration
# Configure huge pages on host
$ echo 1024 | sudo tee /proc/sys/vm/nr_hugepages

# Make permanent
$ echo 'vm.nr_hugepages = 1024' | sudo tee -a /etc/sysctl.conf

# Configure in VM XML
<memoryBacking>
  <hugepages/>
</memoryBacking>
Memory Ballooning
<devices>
  <memballoon model='virtio'>
    <address type='pci' domain='0x0000' bus='0x00' slot='0x08' function='0x0'/>
  </memballoon>
</devices>
I/O Performance Optimization
Storage Configuration
<disk type='file' device='disk'>
  <driver name='qemu' type='qcow2' cache='writeback' io='threads'/>
  <source file='/var/lib/libvirt/images/vm.qcow2'/>
  <target dev='vda' bus='virtio'/>
</disk>
Network Performance
<interface type='bridge'>
  <source bridge='virbr0'/>
  <model type='virtio'/>
  <driver name='vhost' queues='4'/>
</interface>
Direct QEMU/KVM Command Line Usage
For advanced users who prefer direct QEMU command line control over libvirt.
Basic Nested Virtualization with QEMU
Simple Configuration
Advanced VT-x Features
Performance-Optimized Configuration
Performance Monitoring and Benchmarking
Monitor and benchmark nested virtualization performance to ensure optimal configuration.
VT-x Feature Utilization Monitoring
Check VT-x Usage in Guest
Monitor VM Exits
# Check KVM statistics
$ cat /sys/kernel/debug/kvm/exits
exits                 1234567
host_state_reload     12345
hypercalls           4567
request_irq          8901
Performance Benchmarking
CPU Performance Testing
# CPU performance benchmark
$ sysbench cpu --cpu-max-prime=20000 run
sysbench 1.0.18 (using system LuaJIT 2.1.0-beta3)

Running the test with following options:
Number of threads: 1
Initializing random number generator from current time

Prime numbers limit: 20000

Initializing worker threads...

Threads started!

CPU speed:
    events per second:  1234.56

General statistics:
    total time:                          10.0001s
    total number of events:              12346

# Disk I/O benchmark
$ time dd if=/dev/zero of=/tmp/test bs=1M count=1000
1000+0 records in
1000+0 records out
1048576000 bytes (1.0 GB, 1000 MiB) copied, 2.34567 s, 447 MB/s

real    0m2.346s
user    0m0.001s
sys     0m0.987s
Memory Performance Testing
# Memory bandwidth test
$ sysbench memory --memory-block-size=1M --memory-total-size=10G run

# Memory latency test
$ lat_mem_rd -s 512 -N 2 -t
Troubleshooting Common Issues
Resolve frequent problems encountered in nested virtualization setups.
Hardware and BIOS Issues
Problem: VT-x Not Available
Error Messages:
Solutions:
# 1. Check BIOS settings
# - Ensure VT-x is enabled in BIOS/UEFI
# - Disable Secure Boot if required
# - Enable VT-d for I/O virtualization

# 2. Verify CPU support
$ egrep -c '(vmx|svm)' /proc/cpuinfo
8  # Should be > 0

# 3. Check for conflicting software
$ sudo systemctl status vmware
$ sudo systemctl status virtualbox
Module Configuration Issues
Problem: Nested Virtualization Not Supported
Check Current Status:
$ cat /sys/module/kvm_intel/parameters/nested
N
Solutions:
# 1. Reload module with nested support
$ sudo modprobe -r kvm_intel
$ sudo modprobe kvm_intel nested=1

# 2. Make permanent
$ echo 'options kvm_intel nested=1' | sudo tee /etc/modprobe.d/kvm.conf

# 3. Update initramfs
$ sudo update-initramfs -u
$ sudo reboot
Guest VM Configuration Issues
Problem: VT-x Not Recognized in Guest
Check Guest Configuration:
$ virsh dumpxml vm-name | grep -A5 -B5 cpu
<cpu mode='custom' match='exact' check='partial'>
  <model fallback='allow'>Skylake-Client-IBRS</model>
</cpu>
Solution: Update CPU Configuration:
<cpu mode='host-passthrough' check='none'>
  <feature policy='require' name='vmx'/>
</cpu>
Apply Changes:
$ virsh shutdown vm-name
$ virsh edit vm-name
# Make changes and save
$ virsh start vm-name
Performance Issues
Problem: Poor Nested VM Performance
Diagnostic Commands:
# Check CPU usage
$ top -p $(pgrep qemu)

# Monitor I/O statistics
$ iostat -x 1

# Check memory usage
$ free -h && cat /proc/meminfo | grep -i huge
Optimization Solutions:
# 1. Enable CPU pinning
$ virsh vcpupin vm-name 0 0
$ virsh vcpupin vm-name 1 1

# 2. Configure huge pages
$ echo 2048 | sudo tee /proc/sys/vm/nr_hugepages

# 3. Optimize storage
$ virsh edit vm-name
# Add: <driver name='qemu' type='qcow2' cache='writeback'/>
Security Considerations
Understanding and mitigating security risks associated with nested virtualization.
Security Risks in Nested Virtualization
1. VM Escape Vulnerabilities
- Increased Attack Surface: Multiple virtualization layers create more potential escape vectors
- Hardware Feature Exposure: Guest VMs gain access to host CPU features
- Side-Channel Attacks: Hardware features can leak information across VM boundaries
2. Resource Exhaustion Attacks
# Monitor resource usage in nested environments
$ virsh domstats --cpu-total --memory --block --balloon vm-name

# Set resource limits
$ virsh edit vm-name
<memtune>
  <hard_limit unit='KiB'>8388608</hard_limit>
  <soft_limit unit='KiB'>6291456</soft_limit>
</memtune>
<cputune>
  <shares>2048</shares>
  <period>100000</period>
  <quota>200000</quota>
</cputune>
Security Hardening Measures
Disable Unnecessary CPU Features
<cpu mode='host-passthrough'>
  <feature policy='require' name='vmx'/>
  <!-- Disable potentially risky features -->
  <feature policy='disable' name='invtsc'/>
  <feature policy='disable' name='amd-stibp'/>
  <feature policy='disable' name='spec-ctrl'/>
</cpu>
Network Isolation
<!-- Use isolated networks for nested VMs -->
<interface type='network'>
  <source network='isolated'/>
  <model type='virtio'/>
</interface>
# Create isolated network
$ virsh net-define /dev/stdin <<EOF
<network>
  <name>isolated</name>
  <bridge name='virbr1' stp='on' delay='0'/>
  <domain name='isolated'/>
  <ip address='192.168.100.1' netmask='255.255.255.0'>
    <dhcp>
      <range start='192.168.100.2' end='192.168.100.254'/>
    </dhcp>
  </ip>
</network>
EOF

$ virsh net-start isolated
$ virsh net-autostart isolated
Access Control and Monitoring
# Monitor VM activities
$ journalctl -u libvirtd -f

# Set up SELinux/AppArmor policies
$ sudo setsebool -P virt_use_execmem 1

# Implement logging for nested VMs
$ echo 'log_level = 1' | sudo tee -a /etc/libvirt/libvirtd.conf
$ sudo systemctl restart libvirtd
Key Points
-
Hardware Requirements
- Intel VT-x or AMD-V CPU support required
- BIOS/UEFI virtualization features must be enabled
- Sufficient CPU cores and memory for nested workloads
- EPT/RVI support recommended for optimal performance -
Configuration Steps
- Enable nested parameter in KVM modules
- Configure guest VMs with host-passthrough CPU mode
- Enable specific CPU features (vmx/svm, ept, vpid)
- Optimize performance through CPU pinning and huge pages -
Use Cases and Considerations
- Ideal for development, testing, and CI/CD environments
- Cloud platform testing and virtualization research
- Performance overhead: 10-30% compared to native virtualization
- Security implications require careful consideration and hardening
Conclusion
KVM Nested Virtualization enables powerful VM-within-VM scenarios that are invaluable for development, testing, and cloud platform evaluation. While the setup requires careful configuration of hardware features, kernel modules, and guest VM settings, the resulting flexibility makes it an essential tool for modern virtualization workflows.
The key to successful nested virtualization lies in proper hardware configuration, optimal CPU feature utilization, and performance tuning. By following the guidelines in this comprehensive guide, you can build robust nested virtualization environments that meet your specific requirements.
Best Practices Recap
- Verify hardware support before attempting configuration
- Enable all relevant VT-x features for optimal performance
- Use host-passthrough CPU mode for maximum compatibility
- Implement proper resource limits to prevent resource exhaustion
- Monitor performance and adjust configurations as needed
Future Applications
As container technologies, cloud-native architectures, and edge computing continue evolving, nested virtualization will remain crucial for testing complex deployment scenarios and developing virtualization-aware applications.
For DevOps, cloud testing, and container-based virtualization practice, start exploring nested virtualization today!

Comments